A perspective is the container for a set of views and editors. The most commonly used perspective is probably “Java” which contains a set of views for Java development such as a package explorer, an editor, a console, etc. You can switch to another perspective by clicking “Window” -> “Open Perspective”. Switching perspectives let you have different set of views which provide different functions.
Creating a perspective in Eclipse is straightforward. The following are steps for adding a perspective.
1. Create a Plug-in Project
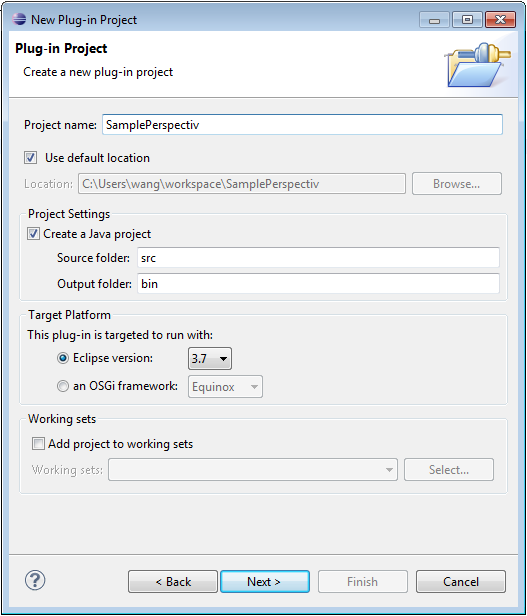
Create a plug-in project by using the wizard.
2. Add Extension Points
Under “Overview” view of your plug-in, click “Extensions” tab. The “Overview” makes plug-in development very easy to do by providing wizards.
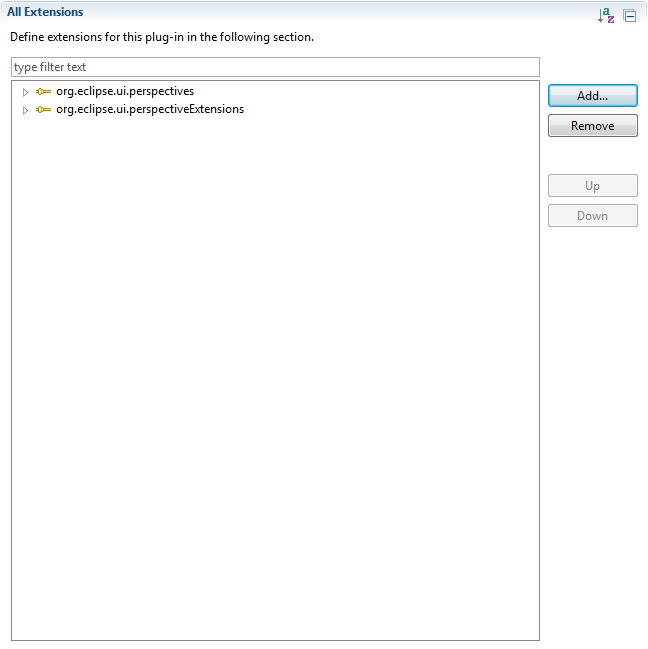
Add two extension points by using Extension Wizard: “org.eclipse.ui.perspectives” and “org.eclipse.ui.perspectiveExtensions”. The Wizard makes this easy, but what it really does is changing the plugin.xml file.
After adding the two extension points, the extensions tab looks like the following:
If you go to the plugin.xml file, you can see what are added – perspectives and perspectiveExtensions.
<?xml version="1.0" encoding="UTF-8"?> <?eclipse version="3.4"?> <plugin> <extension point="org.eclipse.ui.perspectives"> <perspective class="sampleperspective.PerspectiveFactory1" fixed="true" id="SamplePerspective.perspective1" name="SamplePerspective"> </perspective> </extension> <extension point="org.eclipse.ui.perspectiveExtensions"> <perspectiveExtension targetID="SamplePerspective.perspective1"> </perspectiveExtension> </extension> </plugin> |
3. Add views to perspective
Now a perspective is added, we need to add some views so that the perspective provides some functions. In your plugin.xml file, change the plugin.xml file to the following:
<?xml version="1.0" encoding="UTF-8"?> <?eclipse version="3.4"?> <plugin> <extension point="org.eclipse.ui.perspectives"> <perspective class="sampleperspective.PerspectiveFactory1" fixed="true" id="SamplePerspective.perspective1" name="SamplePerspective"> </perspective> </extension> <extension point="org.eclipse.ui.perspectiveExtensions"> <perspectiveExtension targetID="SamplePerspective.perspective1"> <view id="org.eclipse.jdt.ui.PackageExplorer" minimized="false" moveable="false" ratio="0.5" relationship="left" relative="org.eclipse.ui.console.ConsoleView" visible="true"> </view> <view id="org.eclipse.ui.console.ConsoleView" minimized="false" moveable="false" ratio="0.5" relationship="right" relative="org.eclipse.jdt.ui.PackageExplorer" visible="true"> </view> </perspectiveExtension> </extension> </plugin> |
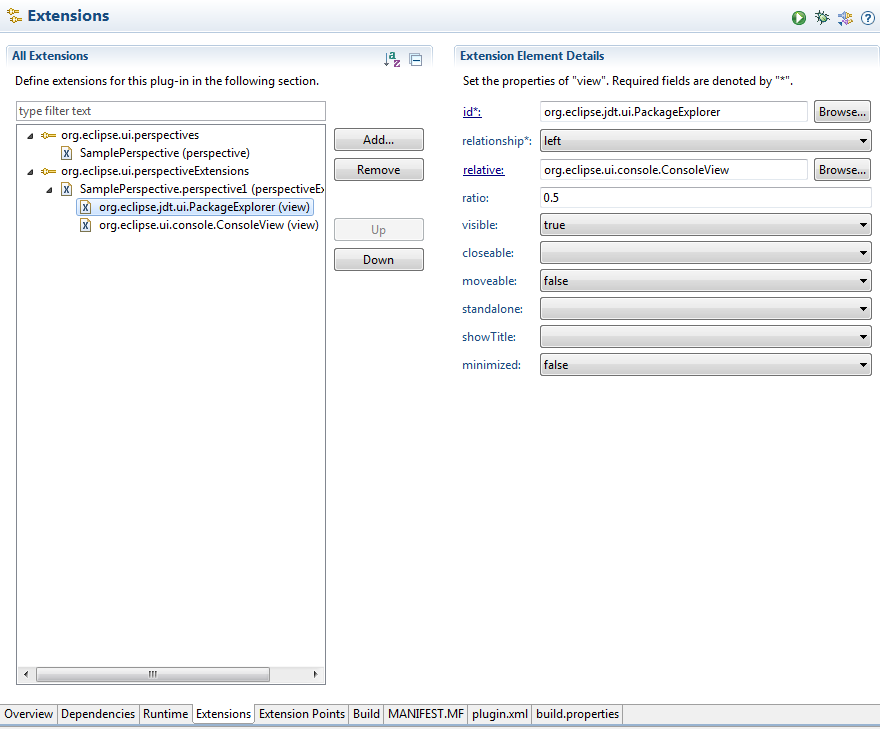
Two views are added in the xml file. Now if you switch back to Extensions tab and click a view, the right side shows the properties you can set for the view.
“minimized” determines whether the view is minimized or not, “ratio” sets the size of the view, “relationship” indicates the placement of the view, etc.
It is strange that if you don’t add view in the plugin.xml file first, the wizard does not show up. But if you add a view, then it is easy to configure the view’s property. So the strategy is add a view in the plugin.xml file. Then go back to the wizard where you not only set view’s attributes, but also find correct id.
4. Add the PerspectiveFactory class, the perspective extension points to. (In plugin.xml file, class=”sampleperspective.PerspectiveFactory1″)
Here it is not necessary to do something, just implements IPerspectiveFactory. The createInitialLayout can add views but we add views through plugin.xml file.
package sampleperspective; import org.eclipse.ui.IPageLayout; import org.eclipse.ui.IPerspectiveFactory; public class PerspectiveFactory1 implements IPerspectiveFactory { @Override public void createInitialLayout(IPageLayout layout) { // TODO Auto-generated method stub } } |
Done
Run the plug-in, and in eclipse click “Window” -> “Open Perspective” and select “SamplePerspective”.
The perspective created contains two views – Explorer and Console:


Greetings. I know this is somewhat off-topic, but I was wondering if you knew where I could get a captcha plugin for my comment form? I’m using the same blog platform like yours, and I’m having difficulty finding one? Thanks a lot.
https://www.gangboard.com/cloud-computing-training/aws-training
http://www.besanttechnologies.in/amazon-web-services-training-in-chennai.html
http://www.besanttechnologies.in/amazon-web-services-training-in-bangalore.html
After 4 years you still didnt update it 😀
Thanks a lot for comment! I will update it later.
P.S. My program window
For example:
1) You didn’t write what to answer to “Would you like to create a rich client application” (I suggest “no”)
2) You wrote to name project “SamplePerspectiv” but probably meant “SamplePerspective”; anyway if some automatic features (generate an activator) activated, the package will be created with that name
3) If just create empty plugin project (no generate an activator), “Plug-ins declaring extensions or extension points must set the singleton directive to true MANIFEST.MF” error occurs
4) XML file causes warning “Referenced identifier ‘SamplePerspective.perspective1’ in attribute ‘targetID’ cannot be found”
5) Finally I get totally different result of program running.
I am a newbie, so can’t know whether these are mine errors.
What errors did you get?
Many errors in the article. Just doesn’t work if done as written.